- Welcome Guest
- Your Cart Is Empty
- Program Tools
- Original Brand Tool
- Auto Key Programmer
- Car Diagnostic Tools
- ECU Chip Tunning
- Pincode reader
- Mileage Programmer
- Heavy Duty Diagnostic
- Airbag Reset Tool
- Hot Car Accessories
- OBD2 Code Scanner
- CLONING TOOLS
- Transponder Key Cloning Tools
- Transponder Key
- Maserati
- Great Wall
- Daihatsu
- Alfa Romeo
- TOYOTA
- HONDA
- Cadillac
- RENAULT
- ZHONGHUA
- Chrysler
- FIAT
- GM
- Mercedes-Benz
- Subaru
- Chevrolet
- Acura
- Hyundai
- BYD
- VOLKSWAGEN
- Peugeot
- LEXUS
- Landrover
- Skoda
- Citroen
- Seat
- Infiniti
- Dodge
- Volvo
- SUZUKI
- BMW
- Ford
- BUICK
- Porsche
- Bentley
- KIA
- Opel
- AUDI
- MITSUBISHI
- Jaguar
- Proton
- MAZDA
- NISSAN
- China Car
- SAAB
- Saipa
- Luxgen
- Motocycle
- Transponder Chip
- Transponder Chips
- Motorcycle Key Chips
- Cloneable Chips
- Chip Package
- Locksmith Tools
- Key Cutting & Lock Pick Tool
- key cutting machine
- Key moulds & clamps
- Car Lock 2 in 1 picks
- LISHI 2 in 1 tools
- LISHI pick tools
- LISHI pick tools group
- Auto lock reed repair kits
- House lock pick
- Car Door open
- Spacing & Depth Keys
- CUTTING MACHINE
- SEC-E9
- Kaida-Jinji
- WENXING Machine
- wenxing cutter
- keymam brand cutter
- Lock
- Practice Lock Set
- Car Lock
- TSA lock,Padlock
- Door Lock
- KEYDIY
- KeyDiy
- Keyblade for KeyDiy
- REMOTE MASTER
- Remote Master
- Proximity card Copy Machine
- Selflearning Remote_315MHZ
- Remote Clone Expert
- Selflearning frequency adjustable
- Selflearning Remote_433MHZ
- Rolling Code Remote_315MHZ
- Rolling Code Remote_433MHZ
- key blade and logo
- House Key Blanks
- House Lock Key
- Key Case Rubber
- Auto Button Rubber
- OTHER PRODUCT
- Other Product
- security cameras
- Out Of Stock
- VR IP Camera

- Product Category : HONDA
- Item No. : KMWYZD116
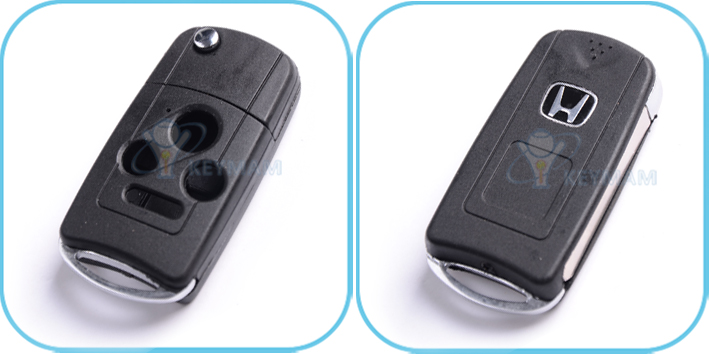
- Product Model : honda_4b_flipkeyshell_usa type
- Product Weight : 45 g
- Retail Price : US$6.70
- Integral : 6
- Buy 10+ for US$6.60 each
- Buy 20+ for US$6.40 each
- Buy 50+ for US$6.20 each

| Model | KMWYZD116 |
| Type | Folding/Flip Key |
| Color | Black |
| Alternative Colors | N/A |
| Key Blank | Yes |
| Button | Lock/Unlock/Trunk + Panic |
| Logo Sticker | Yes |
| Transponder Chip | No |
| Electronics/Battery | No |
| Weight | 50g |
| Size (millimeter) | 69.0 (L) x 37.5 (W) x 16.0 (T) |
| Size (inch) | 2.7 (L) x 1.5 (W) x 0.6 (T) |
| Work With Vehicle Models for Reference | 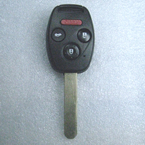 Lock/Unlock/Trunk + Panic Buttons of 2003 - 2010 HONDA Accord 2006 - 2010 HONDA Civic 2005 - 2010 HONDA CR-V 2005 - 2010 HONDA Pilot 2007 - 2010 HONDA Fit Other Honda Remote Keys with same buttons |
| Notice | If the transponder chip inside your remote key case is NOT detachable. Please contact us before you bid. Some solder works are probably needed. |
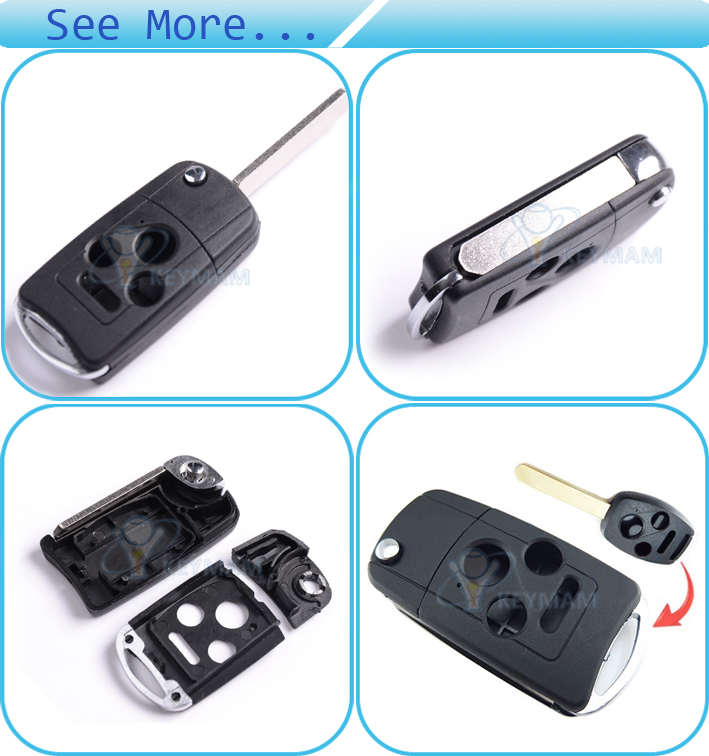
| Description | Here listed is a high-quality aftermarket flip key unit in new stylish design. It has a reinforced shell constructed with thicker plastic and metal keyblade anchor and come with the new UNCUT keyblade and logo sticker. Just cut the keyblade, take the internal electronics (include immobilizer/transponder chip) from original remote and place them to our key shell, then you are ready! There's NO PROGRAMMING NEEDED. The keyblade needs to be cut at local dealer or a locksmith. Different dealers/locksmiths provides services in variant prices. Please note there is NO interior (remote / electronics / transponder chips / battery) unit inside. |
Honda civic 3+1 Button Flip Remote Key shell (USA type)
Mr maximus20895 show your how to use this key shell DIY.
If your key chip is not inside the remote ,then not need to do a lot of work, only put the black chip inside the chip slot.
Okay so I know there are several DIYs on how to make a flip key, but I couldn't find any that were extremely clear nor that had a bunch of pictures so I decided to make one to help people out. Hope you enjoy

NOTE: I had to shave a little piece where the bottom of the FOB rests on the flip key since the panic button was protruding and I was accidentally turning it on. Place the FOB in the flip key and make sure the keys are not protruding before you begin.
I also have heard alot of talk as to where to get the key cut. I got mine cut at ACE Hardware for a massive total of $.93. I think the guy said he should of charged be $2-$3 though. Before you go to ACE or where ever make sure they have the special key cutting machine. The keys are called Safe Cut Keys I think or something like that and they will CANNOT be cut using an ordinary key cutting machine. The machine is all manual. They have to take the cut key and put it on a vice while they outline it manually and cut the blank key. It took the guy about 10 minutes to do mine.
You need:
- Stock or working key FOB. Preferably one that is already programmed as it costs a pretty penny to have it programmed.
- A flip key case. you can get any one as long as the holes fit your FOB
- Very small wire. I think I got gauge 30, but I am not positive. It is like floss.
- Wire strippers or a knife to strip to wire
- Small screw driver to get the key screws out
- Drill or something to poke a hole through the clear plastic cover of the key
- Exacto Knife
- Soldering Iron
- Solder
- Patience
1. The first thing you need is your stock key or at least the FOB.

2. You also need a flip key of some sort.

3. After you have those you need to take off the cover of the stock key. Just remove the screw. You will also see an indent on the side of the cover where you can fit a flat head or your finger nail to pry it up.

4. After that, just pull out the FOB. You will notice 2 tabs, one on the top and one on the bottom of the FOB.

5. Pry the tabs so you can take off the black plastic piece.

6. Then take off the clear plastic cover, printed circuit board and the grey silicone that has the buttons on it.

7. Here are all the pieces you should have. I took two off, but for some reason left out the other printed circuit board.

8. Now let's focus on the printed circuit board as it contains the transponder that we need to solder off.  We need to do this because the transponder has to be extremely close to the key in order for the car to turn on. In the flip key, the key is further away from the FOB, therefore we have to take the transponder out and put it closer to the key. This will make more sense once you see a picture of the inside of the flip key later in the DIY.

9. As you can see, the transponder is the rectangular piece with the letters and numbers on it. If you look closely you can see some solder on the end of it. Here is the other side with more solder on it. There is also solder on the bottom ends of the transponder that you will see in the picture with the transponder off the printed circuit board. I also heated up the other side of the printed circuit board to heat up and melt the solder.

10. What you need to do is put the printed circuit board on a vice of some sort and solder the transponder off. There is also glue on the underside. You can take that off by getting your exacto knife and carefully cutting under it. Before you take off the transponder take a picture of it on the printed circuit board or make sure you know which contact goes where as far as the positive and negative goes. You also need to be VERY VERY careful not to solder the transponder too much. The transponder WILL MELT and you will either have to try with another key or buy another key to try again. I cannot stress this enough that for the novice soldering iron users that you need to be careful!!!
Here is the printed circuit board with and without the transponder.

Here is a better view of the printed circuit board without the transponder. You can see the solder that you need to heat/melt in order to take the transponder off. If you look carefully, you can also see some glue residue as well.

11. Hopefully you got the bastard transponder out without melting or breaking it. Now we need to solder the wires on the printed circuit board. As well as soldering the wires we need to drill a hole through the clear plastic cover and make a hole in the grey silicone thing that contains the buttons.

12. Now you need to solder the wires on the transponder. There should be some left over solder on the transponder, but if not you can just use some that you have around the house. Make sure to solder the correct side of the transponder with positive and negative contacts on the printed circuit board.

13. After the transponder has the wires soldered, you can close the case. You can close it before, but I only had one color of wire so I wanted to make sure that I got the positive and negative contacts correct. This is what it should look like when done.


14. Now that you have the hardest part out of the way, it's time to put the FOB and the transponder in the flip key. Here is what the flip key looks like when opened.


If you notice, there is a rectangular place for the transponder to go.


15. You need to put the transponder in the rectangular section before you put the key in as you will only have one hand as you are holding down the key. After you have the key in you need to turn the plastic piece that contains the transponder upside down so you can use a very small piece of tape to keep the transponder from falling out if you wish. You don't need to place the FOB in the big bottom piece as it is pictured. Just put the transponder in the top piece and let the FOB sit on the table. You don't mess with the bottom piece until later.

16. Now you need to get the key in. This is a little bit tricky at first since you have to spring it back and figure out how the button goes into the key. If you look at the key and the button you will notice there are notches in both. Just drop the button in from the bottom of the key. This might take a little bit of practice as you have to turn the key to fit the various notches.

Here is the button in the key. You will also notice that the spring is over the plastic **** looking thing sticking up and the part where the spring is is in between the two raised parts of the plastic.

17. Carefully put the button over the spring and twist the key counter clockwise. I usually have to twist the key between one and two times for the spring to have enough force to snap back pretty quick. After you did that you should hold it with your thumb on the pivot point as the key is both trying to move clockwise and trying to pop out of the ****. So put force vertically and horizontally at the same time.

18. Now that you got the key in you need to put the top piece that already has the transponder in it on the top of the key. When you are done with that, make sure to look and see if the transponder is in the rectangular piece. It should look like this when you are done with this step.

19. When that is done, put the screw in the back of the key and test if the key springs back and forth like you would like. If not just take the screw out and try to mess with the spring and key again.

20. After you have the key working the way you want it you can bend/shape the wires so they don't protrude out the edges of the case.

21. When the wires are in place, put the bottom plastic piece on the key FOB and angle it under the smaller, top piece that hold the transponder. You might have to fool around with it a bit so the latches get underneath the top piece and the FOB rests in the raised edges designed for it so that it doesn't move. On mine, the chrome thing that connects to the keychain also has to be put on at this time. When that is done screw on the bottom piece.

22. Mine also came with a Honda emblem. The emblem did not have an adhesive since it fits perfectly in the hole. Put this emblem on only after you have tested the key and all is working. I actually sacrificed and scratched the emblem since I had to take everything apart in order to make this DIY.

23. After you screwed on all the pieces, go and test your new key! Hopefully you soldered everything correctly and the transponder is placed close enough to the key so the car turns on! 


I hope that I have been of some help! If you have any question just ask! I will be more than happy to assist you!
Thanks 
PS:This Invitation is from http://www.8thcivic.com/forums/
Thank you very much for maximus20895
- View Detail
- Credit Card Lock Pick Set - Secure Pro Credit Card-Sized Lock Picking Set - Emergency Lockpick Card


- View Detail
- DegeTools Pump Air Wedge Airbag Tools,for windows install 4 pack

- View Detail
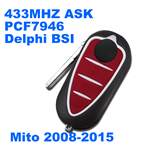
- Mito 3 Button Flip Pcf7946 433mhz Delphi BSI

- View Detail
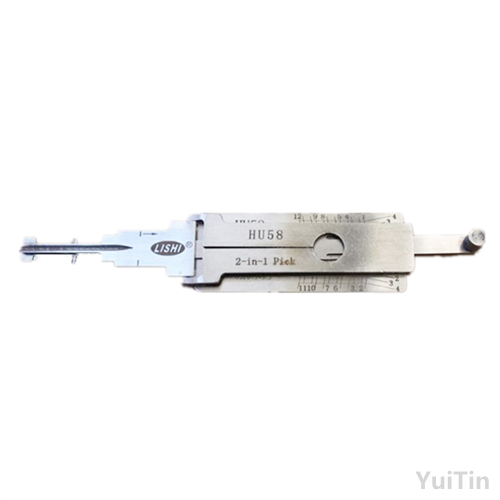
- High quality locksmith tool HU58 2 in 1 Genuine LiShi Locksmith Professional Car/Auto Repair Tools

